How To Grow Roses From Cuttings? 7 Simple Steps For Success
Need a simple way to propagate roses? This guide teaches you how to grow roses from cuttings, ensuring success from start to finish.
Sep 15, 20247.4K Shares202.1K Views

Growing roses from cuttings is one of the most rewarding gardening experiences, offering a way to expand your rose collection or preserve cherished varieties.
There are countless rose varieties, ranging from the classic red hybrid tea roses to the fragrant and delicate English roses, each offering unique colors, shapes, and scents for every garden or bouquet.
For many gardeners, the idea of propagating roses might seem complex, but with the right guidance, it’s surprisingly simple and cost-effective.
Each new rose that takes root is a testament to patience and care, transforming your garden with blooms identical to the parent plant.
This process allows you to replicate your favorite roses, create thoughtful gifts for loved ones, and even revive older plants that have lost their vigor.
By following straightforward steps, even beginner gardeners can successfully propagate roses from cuttings and enjoy the beauty they bring season after season. Ready to give it a try?
What Is Rose Propagation?
Rose propagation refers to the process of reproducing a new rose plant from an existing one. Unlike growing from seeds, where the plant's traits can be unpredictable, propagating from cuttings ensures that the new plant will be a replica of the parent plant.
Here are some key reasons gardeners choose to propagate roses:
- Cost-Effective: Growing new plants from cuttings is far less expensive than purchasing new ones.
- Preservation: This method helps preserve favorite or heirloom varieties, ensuring their continuity in your garden.
- Sharing: Propagated rose cuttings make great gifts for friends and family or can be traded with fellow gardeners.
Rose Propagation Methods
While there are several ways to propagate roses, stem cuttingsare the easiest and most reliable, especially for beginners. Depending on the season, you can choose from three main types:
- Softwood Cuttings(Best for Beginners): Taken in late spring or early summer, these root the fastest and are ideal for those new to rose propagation.
- Semi-Hardwood Cuttings: Taken in late summer or early fall, these stems are firmer and may take longer to root but still have a high success rate.
- Hardwood Cuttings(For Experienced Gardeners): Taken in late fall or winter, these dormant, woody stems root the slowest and require more patience and expertise.
This helps clarify the benefits of each cutting type while ensuring that readers know which method suits their needs.
When Is The Best Time To Take Rose Cuttings?
Timing is crucial for successful rose propagation. The ideal time for cuttings is during late spring to early summer, when plants are actively growing. However, timing can vary depending on your region:
- Temperate Climates: Late spring to early summer is optimal for softwood cuttings.
- Warmer Climates: You can extend into late summer or even early fall for semi-hardwood cuttings.
- Colder Climates: For hardwood cuttings, late fall to winter works best when stems are dormant.
The best time to take cuttings is in the morning, when the plant is fully hydrated, and on a dry, mild day with temperatures between 70°F and 80°F.
Materials You’ll Need
Gather all necessary tools and materials before starting:
- Sharp Pruning Shears or Scissors: Sterilize with rubbing alcohol to prevent disease.
- Rooting Hormone: Helps speed up root development, especially for difficult-to-root varieties.
- Small Pots or Containers: Ensure they have proper drainage.
- Rooting Medium: A 50/50 mix of perlite and potting soil or a mix of sand and vermiculite works best.
- Plastic Bag or Dome: To create a mini-greenhouse for maintaining humidity around the cutting.
- Spray Bottle: For misting the cutting and keeping it hydrated.
Having the right materials on hand ensures that your cuttings have the best possible environment for root development.
Step-by-Step Process To Grow Roses From Cuttings
Step 1: Prepare The Rooting Medium
Fill a clean pot with your chosen rooting medium. Lightly moisten the mixture to create an ideal environment for the cutting without over-saturating it. If planting directly in the garden, loosen the soil to a depth of 4-6 inches, incorporating sand for better drainage.
Step 2: Select A Healthy Rose Stem
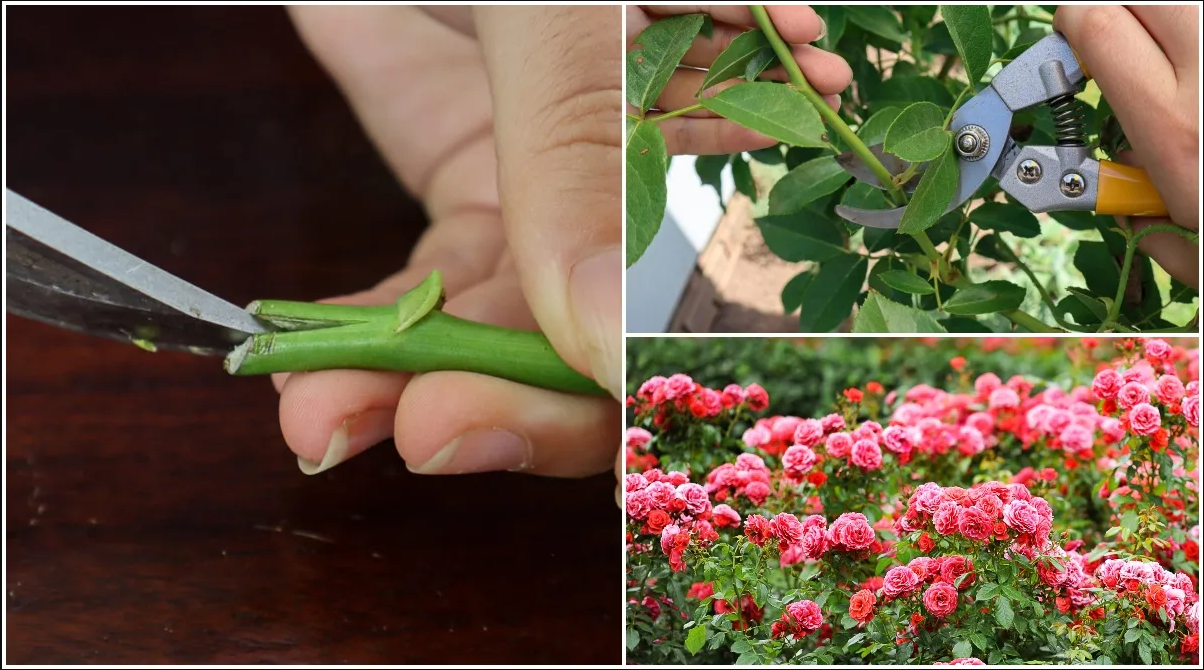
Choose a 4-8 inchstem from a healthy rose plant that has just finished blooming. Ensure the stem is flexible but firm, and avoid overly woody or flowering stems. Ideally, select a cutting with three to five nodes(the points where leaves, buds, or branches emerge).
Step 3: Make The Cut
With sharp, sterilized pruning shears or a clean knife, cut the stem at a 45-degree angle, about a quarter inch below a leaf node. Quickly place the cutting into water to prevent it from drying out. Pro tip:To improve rooting, gently score the bottom inch of the stem vertically with your knife, exposing more surface area for root growth.
Step 4: Prepare The Cutting
Remove all leaves except for one or two sets at the top to reduce water loss. Dip the bottom end of the cutting into rooting hormone to encourage faster root formation.
If you're working with delicate or harder-to-root varieties, this step is essential for better success.
Step 5: Plant The Cutting
Use a stick or pencil to make a 3-4 inch deep hole in the soil or container. Insert the cutting at least two inches deep, ensuring that two nodes are buried beneath the soil. Firmly press the soil around the stem to secure it in place.
Step 6: Create A Mini-Greenhouse
Cover the cutting with a clear plastic bag or dome to trap humidity. Be sure the cover doesn't touch the leaves, as this can lead to rot. Place the pot in bright, indirect sunlight - avoid direct sun, which can cause the cutting to overheat.
Step 7: Caring For Rose Cuttings
Once your cutting is planted, the following weeks are crucial to its success. Here's how to care for your rosecuttings:
- Watering: Ensure the soil stays consistently moist but not soggy. Mist the cutting 2-3 times per week to maintain humidity without overwatering.
- Humidity: High humidity is essential for root development. Keep the cutting covered with a clear plastic dome or bag for several weeks. Pro tip: Check the cutting daily for condensation inside the cover—this is a sign that the humidity levels are ideal.
- Fertilizing: Using a fish, or kelp-based fertilizeronce a month can give the cutting an extra nutrient boost.
Be sure to check your cutting every few days. If your humidity cover doesn’t have ventilation, briefly lift it to allow fresh air to circulate. Remove any cuttings that show signs of browning or decay.
Rooting Timeline
The timeline for root development depends on the type of cutting and growing conditions:
- Softwood Cuttings: Typically begin rooting within 10 to 14 days.
- Semi-Hardwood Cuttings: May take 4 to 6 weeksto develop roots.
- Hardwood Cuttings: Can take 6 to 8 weeks or longer, requiring more patience.
Look for these signs: New leaf growth and resistance when gently tugged. If no roots form within the expected timeframe, check for proper moisture and humidity, and be patient—some cuttings take a little longer.
Transplanting Your Rose Cuttings
Once roots have developed and your cutting shows signs of new growth, you can begin acclimating it to outdoor conditions. Start by removing the humidity cover for a few hours each day to toughen up the plant.
Allow the cutting to grow in its pot for 9-12 monthsbefore moving it to the garden. During this time, you may want to repot it into a larger container using a 20/80 mix of perlite and potting soilto promote further growth.
When transplanting into the garden, choose a sunny spot with well-draining soil. Dig a hole large enough to accommodate the new root system, spread the roots out gently, and water thoroughly after planting.
Common Problems And Solutions
Here are some common challenges you may face during the propagation process and how to address them:
- Problem: Cuttings Wilt or Fail to Root
- Problem: Fungal Growth
- Problem: Slow Root Development
FAQs About Growing Roses From Cuttings
Can You Propagate Roses From Commercial Cut Flowers?
While it’s possible, the success rate is lower since most cut flowers are bred for commercial use and grafted onto stronger rootstocks.
Is It Legal To Propagate Patented Roses?
Patented roses are protected for 20 years and cannot be propagated without permission. After this period, they are legal to propagate.
Can You Root Roses In Water?
Though roses can begin rooting in water, the success rate is low, and the roots are often weak. It's best to use soil or a proper rooting medium.
What Is The Success Rate For Rose Cuttings?
The success rate is typically between 50% and 75%, so it's wise to take several cuttings to improve your chances.
Conclusion
Propagating roses from cuttings opens the door to a world of possibilities, from enhancing your garden with vibrant, healthy plants to preserving rare varieties that carry sentimental value.
With the right preparation, attention to detail, and patience, you can nurture these cuttings into fully blossoming roses that will enrich your outdoor space for years to come.
By understanding the key steps and providing proper care, the satisfaction of growing your own roses from cuttings becomes a deeply fulfilling journey.
Take pride in your new additions and enjoy the beauty they’ll bring to your garden, knowing you had a hand in their growth from start to finish.
Latest Articles
Popular Articles
